

Creating cloud-native CI/CD Pipelines with Tekton
👋 Hey! I'm Lionel T., a random DevOps guy passionate about boosting teamwork and speeding up software delivery.
🚀 I love breaking down walls between devs and ops, creating smooth pipelines for innovation. With a toolbox full of CI/CD, Docker, Kubernetes, and more, I'm all about building robust systems that scale effortlessly.
💡 But it's not just about the tech—it's about building a culture of collaboration and constant improvement. Let's swap stories, brainstorm ideas, and make some DevOps magic!
When evaluating tools for automating your own GitOps-based CI/CD workflow, it is important to keep your requirements and use cases in mind. Tekton deployment is complex and it is not very easy to use. In contrast, Jenkins is more manageable and user-friendly. Integrations and configurability with Tekton are excellent, while with Jenkins they are just ok. Tekton is a complete solution with full CI/CD GitOps workflow coverage while Jenkins includes opinionated CI/CD with additional automation features. Both are tuned for Kubernetes.
Today, let us look at a complete CI/CD pipeline with Tekton.
For modern applications that require CI/CD (continuous integration and continuous delivery/continuous deployment), how do you continuously deliver your code changes from source to production on Kubernetes? In this tutorial, you’ll learn how to use Tekton to clone your repository, build an image, and push it to the Docker Hub. Let’s get started with Tekton, an open-source cloud native CI/CD solution, by creating a real-world CI/CD pipeline.
Introduction
The CI/CD process is fundamental to combining all parts of your code to validate, test, and build before releasing to production or any other stage. Tekton, originally started from the Knative project by Google developers, brings highly reusable and declarative CI/CD components to your cloud-native environment through Kubernetes CRDs. This can help you to concentrate more on developing without worrying about the complexities of the underlying implementation details.
Since Tekton is optimized for simplicity and reusability, let’s look at the different building blocks that can help us build a continuous delivery pipeline.

-Step: The most basic component of Tekton, a Step is a Kubernetes container image that executes on a specific tool or input (ex. Writing or reading a file)
-Task: A sequence of steps to perform a single functionality that can be reused (ex. Cloning a repository)
-Pipeline: Series of tasks executed in series or parallel (ex. Clone a repository, build an image, and push it to a container registry)
Because these components are configured as Custom Resource Definitions on Kubernetes, you can create highly reusable pipelines, and Tekton is also compatible with Jenkins, Skaffold, Knative, and other CI/CD tools. Let’s take a look at getting started with Tekton, and start working on building our pipeline.
Getting started with Tekton

To start, let’s install Tekton and any extras. What we’ll be using Tekton for is the classic container build process, where the Pipeline typically looks like the graphic below. Of course, there are always additional steps like testing, packaging, and deploying to our cluster, but for simplicity, our Pipeline will clone, build an image, and push an image to a container registry like the Docker Hub or Quay.io.

We’ll work with Tasks from the Tekton Hub, create the configurations for our Docker Hub and ServiceAccount, and use a PipelineRun to instantiate our final Pipeline. Let’s begin!
Installing Tekton
Simply use a single kubectl command to install the latest version of Tekton Pipelines.
$ kubectl apply --filename https://storage.googleapis.com/tekton-releases/pipeline/latest/release.yaml
You’ll also want to install the tkn CLI to interact with Tekton; instructions can be found in the documentation.
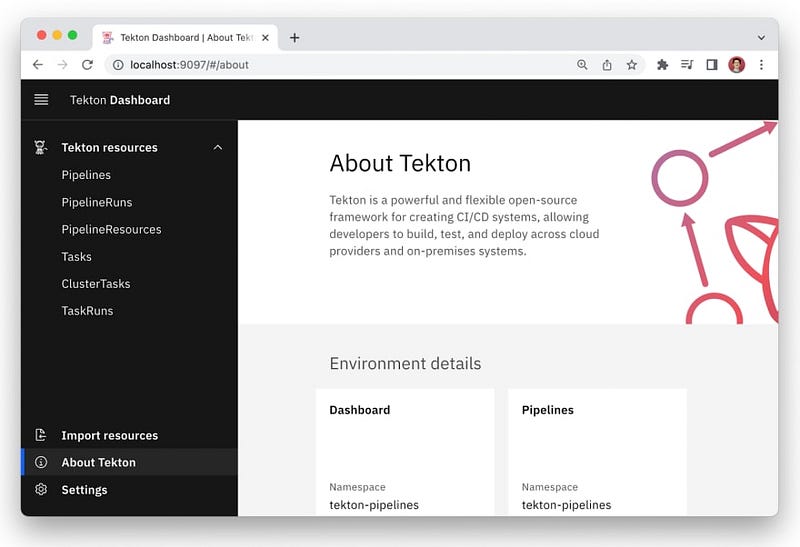
Additionally, feel free to install the Tekton dashboard to visualize our pipeline in a GUI using the Tekton Dashboard.
$ kubectl apply --filename https://storage.googleapis.com/tekton-releases/dashboard/latest/tekton-dashboard-release.yaml
The Tekton Dashboard is not exposed outside the cluster by default, but you can port-forward it using the following command and access it at localhost:9097.
$ kubectl port-forward -n tekton-pipelines service/tekton-dashboard 9097:9097
Creating Tekton Tasks
The tasks we’ll need to create our specific pipeline are already available at the Tekton Hub, a central portal for discovering and sharing Tekton resources, tasks, and pipelines. We’ll use the git-clone and buildah Tasks to clone our repository, build an image, and push the image to a container registry. Feel free to check out the details of these Tasks and their source code.
First, let’s install these Tasks with tkn hub install.
$ tkn hub install task git-clone && tkn hub install task buildah
Task git-clone(0.7) installed in default namespace
Task buildah(0.4) installed in default namespace
Now, let’s confirm the tasks have been successfully installed with tkn task list.
$ tkn task list
NAME                 DESCRIPTION              AGE
git-clone            These Tasks are Git...   2 minutes ago
buildah              Buildah task builds...   2 minutes ago
Image Push Secrets
To push the image to the Docker Hub, you’ll need to provide your credentials, which we can do by creating a file named secret.yaml, with the following content. Be sure to replace username and password with your Docker Hub credentials.
apiVersion: v1
kind: Secret
metadata:
  name: docker-secret
  annotations:
    tekton.dev/docker-0: https://index.docker.io/
type: kubernetes.io/basic-auth
stringData:
    username: username
    password: password
---
apiVersion: v1
kind: ServiceAccount
metadata:
  name: docker-login
secrets:
  - name: docker-secret
This will create a Secret and ServiceAccount, which can now be used when running Tekton tasks, and we can apply it with kubectl.
$ kubectl apply -f secret.yaml
secret/docker-secret created
serviceaccount/docker-login created
Creating a Pipeline
Great! You’re ready to create a pipeline using the two git-clone and buildah tasks. Create a file named pipeline.yaml with the following content.
apiVersion: tekton.dev/v1beta1
kind: Pipeline
metadata:
  name: example-pipeline
spec:
  params:
    - name: REPO
    - name: IMAGE
    - name: TAG
  workspaces:
    - name: workspace
  tasks:
    - name: fetch-repository
      taskRef:
        name: git-clone
      workspaces:
        - name: output
          workspace: workspace
      params:
        - name: url
          value: $(params.REPO)
        - name: deleteExisting
          value: "true"
    - name: build-push-image
      taskRef:
        name: buildah
      runAfter:
        - fetch-repository
      workspaces:
        - name: source
          workspace: workspace
      params:
        - name: IMAGE
          value: "$(params.IMAGE):$(params.TAG)"
        - name: FORMAT
          value: "docker"
This pipeline includes the two tasks we recently installed. First, a git-clone Task to clone our repository, using a url we’ll specify in a PipelineRun. Next, we build and push an image using the buildah Task, using an image and tag we’ll also specify in the PipelineRun to instantiate our Pipeline.
All we need to do to apply this Pipeline configuration to our cluster is use a standard kubectl command.
$ kubectl apply -f pipeline.yaml
pipeline.tekton.dev/example-pipeline created
Creating a PipelineRun
To run the pipeline, we can create a PipelineRun and specify our specific values for the repository, image, and reference to the pipeline. Create a file named pipelinerun.yaml with the following content. Being that Tekton Pipelines are highly reusable, you’re able to use any repository you’d like, and be sure to change your Docker Hub username.
apiVersion: tekton.dev/v1beta1
kind: PipelineRun
metadata:
  name: tutorial-pipeline-run
spec:
  serviceAccountName: docker-login
  pipelineRef:
    name: example-pipeline
  params:
    - name: REPO
      value: "https://github.com/cedricclyburn/tekton-tutorial"
    - name: IMAGE
      value: "docker.io/cedricclyburn/tekton-tutorial"
    - name: TAG
      value: latest
  workspaces:
    - name: workspace
      volumeClaimTemplate:
        spec:
          accessModes:
            - ReadWriteOnce
          resources:
            requests:
              storage: 10Gi
Now, let’s apply the file, and start the deployment with a kubectl command.
$ kubectl apply -f pipelinerun.yaml
pipelinerun.tekton.dev/tutorial-pipeline-run created
We’ve successfully run a pipeline, and to see the logs of the Pipeline, feel free to run the following command.
$ tkn pipeline logs -f
[1/3] STEP 1/5: FROM node:16-alpine AS deps
Resolved "node" as an alias (/etc/containers/registries.conf.d/000-shortnames.conf)
Trying to pull docker.io/library/node:16-alpine...
Checking the Results
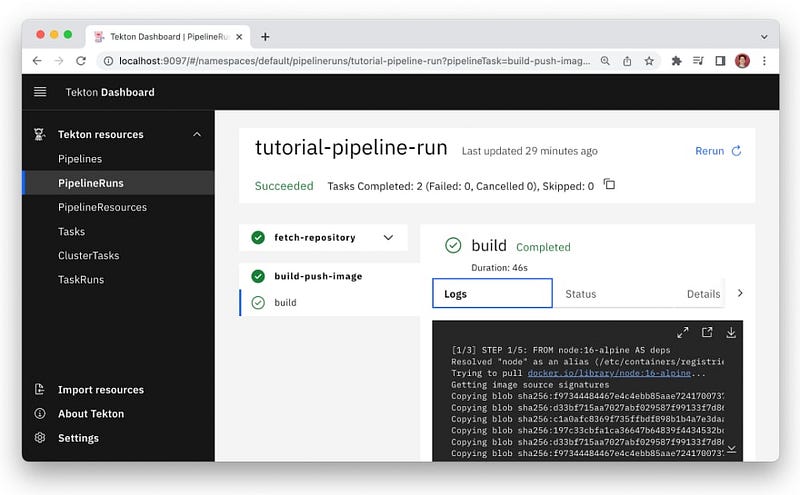
Fantastic! We’ve successfully used a PipelineRun to run our Pipeline, so it’s time to check that everything worked properly. First, let’s use the Tekton Dashboard to view the logs and ensure the PipelineRun has succeeded. From your dashboard, navigate to the _PipelineRuns _tab to view your PipelineRuns, and select the tutorial-pipeline-run we’ve created.

From here, you can visualize the various Tasks of your Pipeline, including the parameters, results, logs, and status of each Task.
Finally, as everything we’ve seen looks good from the Pipeline logs using tkn pipeline logs and from the Tekton Dashboard, let’s run the image using Docker.
N.B.: Feel free to use Podman, a daemonless and rootless container engine, instead as well, by replacing
*docker*with*podman*in the following command.
$ docker run -p 3000:3000 docker.io/cedricclyburn/tekton-tutorial
When visiting localhost:3000, you’ll see the Next.js example application running like so. Congratulations!

Conclusion
Through this guide, you’ve learned how to work with Tekton to create cloud-native CI/CD Pipelines. You’ve also been able to build your own Pipeline to clone a repository, build an image, and push that image to the Docker Hub, all by using Tasks from the Tekton Hub. There are plenty more reusable Tasks and Pipelines there, but I also encourage you to learn about Tekton Triggers (automatically running a Pipeline), other projects of the Continuous Delivery Foundation and the Tekton documentation for more information!
Conclusion
In our previous articles, we looked at creating CI/CD pipelines with Jenkins. Today we did and intro into Tekton and created a simple cloud-native CI/CD pipeline. For any questions, please comment below.
#YouAreAwesome #StayAwesome
Stay tuned and follow me for more updates. Don’t forget to give us your 👏 if you enjoy reading the article as a support to your author!!


