Jenkins & K8S : Creating Dynamically Scalable Jenkins Slaves with Docker and Kubernetes
Using Jenkins and Kubernetes
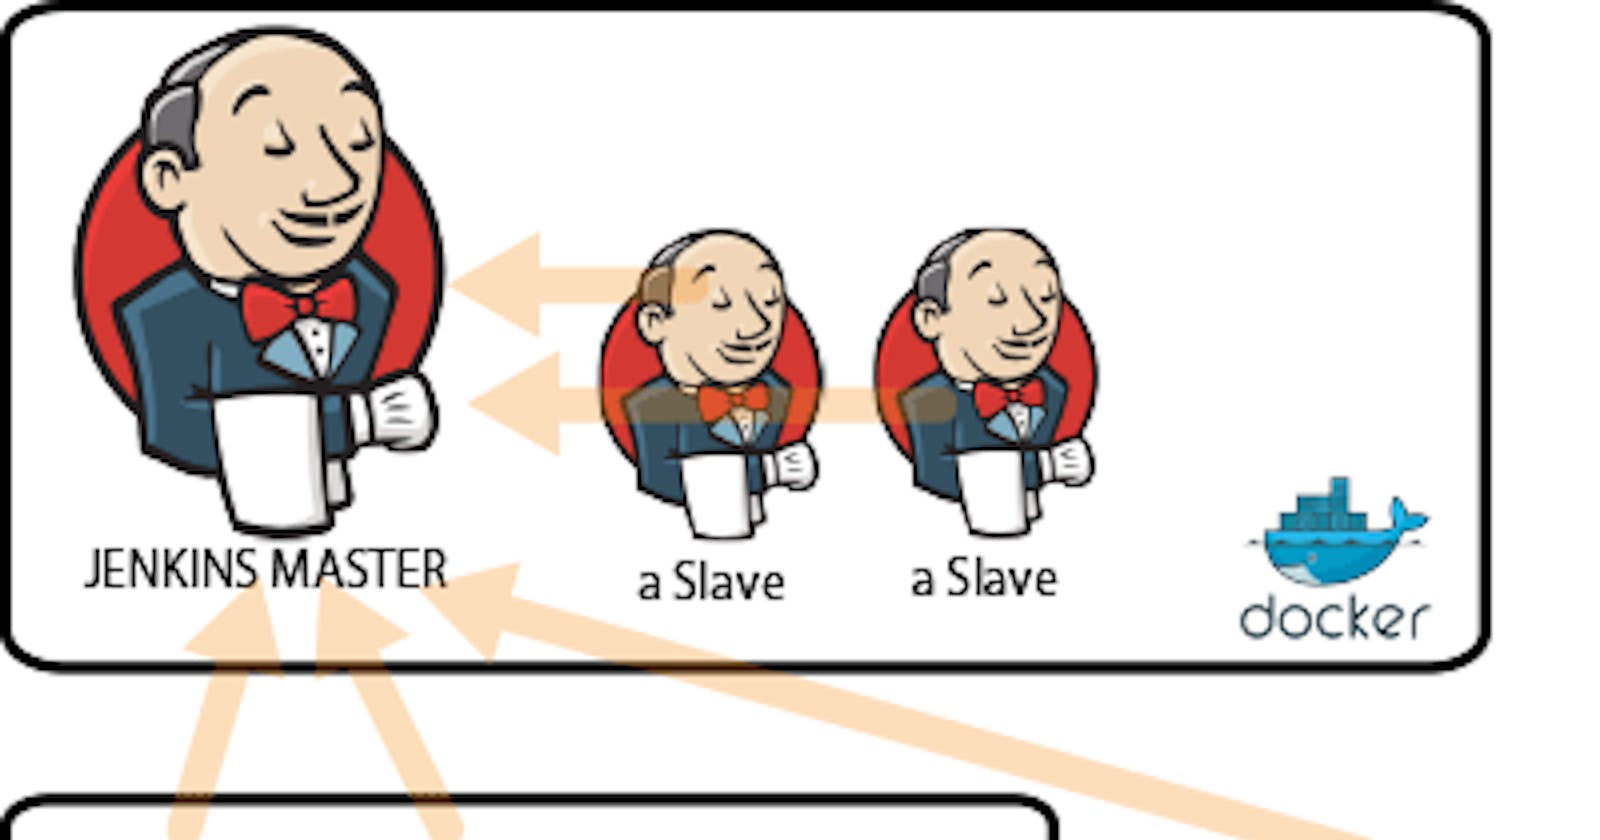
In our previous article, we set up a static Jenkins Master-Slave setup. However, there may be situations where you need scalable Jenkins slaves and not static ones. Today we look at how to set that up.
Plan of Action
We are going to create a Kubernetes template to run the Jenkins Pod as master and dynamically createable slaves which is created by Jenkins itself.
So, first, we are going to create Jenkins master from Kubernetes itself. Then we are going to create the Jenkins template which can be created from the Jenkins master’s UI.
To implement the above idea, we are going to create the following steps to implement the dynamically Scalable Jenkins slaves.
Jenkins Instance service
Jenkins Service Discovery Service
Creating Docker Images with required plugins
Jenkins Deployment
Configuring Jenkins Slaves
Test The configuration — Create Jenkins jobs and run them all together
1. Jenkins Instance Service
As discussed, we are going to use Kubernetes to create a Jenkins instance dynamically and provision it to The Jenkins server. To provision the Jenkins instance, we need Jenkins Kubernetes service to create the Jenkins instance in Kubernetes pods. I have the snippet of code to create the Jenkins instance service in NodePort to route external traffic to the Jenkins server. You can use ingress or external Load balancer to achieve the same.
apiVersion: v1
kind: Service
metadata:
name: jenkins-instance
namespace: jenkins-instance
spec:
ports:
- protocol: TCP
port: 8080
targetPort: 8080
name: master
selector:
app: master
type: NodePort
Create a .yml file for our Jenkins instance service (In our case jenkins-instance-service.yml) and create the service. In this tutorial, I am using kubectl. We do that with the command
kubectl create -f jenkins-instance-service.yml
We will have the output as below
service “Jenkins-instance” created
2. Jenkins Service Discovery Service
Next, we are going to create another service for service discovery which will help us to route the external traffic to our Jenkins-instance clusters. Just like we did for Jenkins-instance service, we must create .yml file for Kubernetes to create the service discovery service. Copy the code and create jenkins-service-discovery-service.yml
apiVersion: v1
kind: Service
metadata:
  name: jenkins-service-discovery
  namespace: jenkins
spec:
  selector:
    app: master
  ports:
    - protocol: TCP
      port: 3838
      targetPort: 3838
      name: slaves
In this, we are defining port 3838 for service discovery ports. Make your network configuration according to that.
Just like the Jenkins-instance service, pass the kubectl command to create the service discovery service.
kubectl create -f jenkins-service-discovery-service.yml
With the following output.
service “jenkins-service-discovery” created
3. Create a Docker Image with the required plugins
To create Kubernetes clusters, Docker image is very important. So, we are going to create the docker image and push it to your docker registry so that we can use it when we deploy the application in Kubernetes. Use the below Dockerfile to create the docker image.
FROM jenkins/jenkins:lts
COPY install-plugin.sh /usr/local/bin/install-plugin.sh
RUN /usr/local/bin/install-plugin.sh ssh-slaves
RUN /usr/local/bin/install-plugins.sh kubernetes
Then, from the directory of this Dockerfile, run the below docker build command to create the docker image
docker build -t apotitech/Jenkins
Then, push the docker image created docker image by passing the below command
docker push <Image ID> apotitech/Jenkins
4. Jenkins-instance Deployment
Now we need to deploy Jenkins-instance so that it will be available as pods. Then, use the below .yml code to create the Kubernetes deployment script (jenkins-instance-deploy.yml).
apiVersion: extensions/v1beta1
kind: Deployment
metadata:
  name: jenkins-instance
  namespace: jenkins-instance
spec:
  replicas: 1
  template:
    metadata:
      labels:
        app: master
    spec:
      containers:
        - image: apotitech/jenkins
          name: jenkins-instance
          ports:
            - containerPort: 8080
              name: jenkins-port
            - containerPort: 3838
              name: jenkins-sd-port
          env:
            - name: JAVA_OPTS
              value: -Djenkins.install.runSetupWizard=false
To deploy the jenkins-instance, run the below kubectl command.
kubectl create -f jenkins-instance-deploy.yml
Then, this will create the pods and check whether all the pods are up and running by passing the following command
kubectl get pods –namespace jenkins-instance
this will throw the following output
NAME READY STATUS RESTARTS AGE
jenkins-instance-5ea2b32ace 1/1 Running 0 3m
If this is running, your Jenkins instance through Kubernetes is running and all other configurations are working. Then, Make sure the two plugins mentioned in the Dockerfile is available or not.
5. Configuring Jenkins Slaves
Now, We need to configure the Jenkins slaves by configuring in the Jenkins UI itself. Follow the below steps to configure.
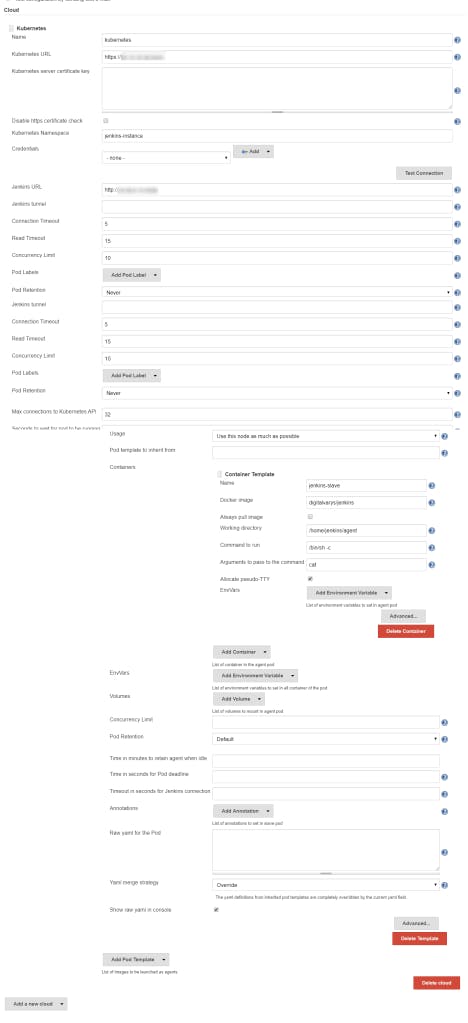
Go to Configure System from Manage Jenkins option and select Cloud section
From here, “Add New Cloud” and select “Kubernetes” the enter the required details of Kubernetes.
To get the details that need to be filled in the Kubernetes form, pass the following command
kubectl describe pod –namespace jenkins-slave
Fill in the details as mentioned in the below screenshot:

Make sure you are filling in Kubernetes URL, Jenkins URL, “Kubernetes Pod Template” by selecting “Add Pod Template” and finally by adding “Container Template” by selecting “Add Container”
That’s it. Configuration of dynamic Scalable Jenkins slaves with Docker and Kubernetes is done.
6. Test The configuration — Create Jenkins jobs and run them all together
To test the above configuration, create two jobs and keep it running for a while. This means, creating Jenkins jobs in such a way that both jobs should run at the same time. Then, once the jobs are started running, check the pod status by running the following command.
kubectl get pods --namespace jenkins-instance
This should return output something like this
NAME READY STATUS RESTARTS AGE
jenkins-instance-5ea2b32ace 1/1 Running 0 3m
jenkins-slave-245da2c165 2/2 Running 0 1m
This means that both jobs are running in two different Jenkins pods and this will be deleted as soon as the jobs are finished running.
Then, All the codes used in this tutorial are available in this Github repo.
Conclusion.
Dynamically creating slaves, especially Kubernetes clusters is very effective as those are available as containers and closed as soon as the jobs are finished running. So, This will save a lot of cost and effort towards configuring the slave Jenkins nodes. Hence, In this article, we have discussed how to create dynamically Scalable Jenkins slaves with Docker and Kubernetes.
Stay tuned and subscribe for more articles and study materials on DevOps, Agile, DevSecOps and App Development.
#YouAreAwesome #StayAwesome


